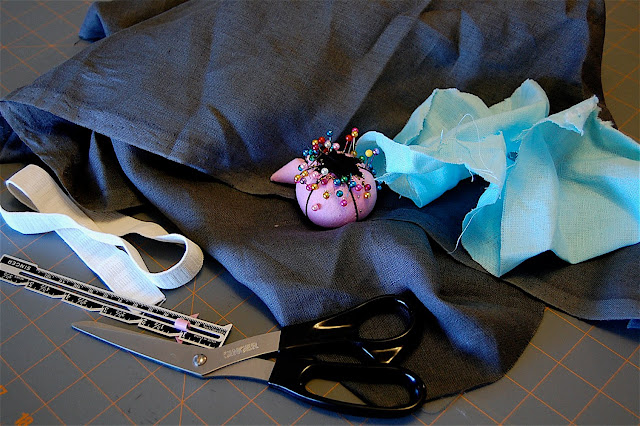
I've shared before that I have a stash of four or five giant scrap bags from a local shop hiding out in my garage. I've been trying to use them up (so I can collect more) and thought I'd make a little tutorial on how to make a skirt. I grabbed some gray linen and a few other things I had on hand to make one for Eleanor. You could use any kind of fabric, or even an old t-shirt or dress to make your own. The tutorial is perfect for any size skirt--whether for a doll, your daughter, or yourself, you should be able to whip this up in no time!
Materials Needed:
- fabric of choice (measurements will vary depending on the size of skirt you wish to make)
- scissors or rotary cutter
- measuring tape (not pictured, Eleanor ran off with it)
- pins
- elastic for waistband
- seam ruler
- iron & ironing board
I'd also recommend using a cutting mat, quilting ruler, and tailor's chalk or a fabric pen/pencil.
1. Take your measurements.
I chased Eleanor down and wrapped my measuring tape around her little waist and came up with about an 18-inch waist measurement. If you don't have a toddler to run after, just wrap the tape around your own waist (or your doll's)--and I use the term waist loosely, just measure where you want your skirt to fit.
Cut your elastic to your waist measurement and make sure your fabric is at least double the length, with a half-inch added for the seam allowance.
Next, measure the length you want your skirt to be. I wanted Eleanor's to come down to her knees, so I measured from where I wanted the waist to be and got 11 1/2 inches, adding 1 1/2 inches for the seam allowance for a total of 13 inches. (You don't want to forget your seam allowances or the skirt will come out tighter and shorter than you intended.)
2. Prepare your fabric.
If you haven't done so already, be sure to iron your fabric before you mark and cut it. Using your tailor's chalk or fabric pen, mark your measurements (including the seam lines) to create your base rectangle for the skirt. You can also cut your fabric directly along the edge of your quilting ruler with a rotary cutter without marking the lines. I prefer cutting with my scissors, and marking my measurements directly onto the fabric helps me see that I'm not making any mistakes.
3. Sew the side seam.
Fold your fabric in half width wise (or vertically) and baste with pins. Sew a half-inch seam along the edge. If you have a serger, you can also serge the side to strengthen the seam. If not, you can add a zig-zag stitch alongside your straight stitch. This is what your seam would look like following the second method:
4. Prepare the waistband.
Measure the width of your elastic to ensure that you make the waistband wide enough (you want to be able to get the elastic through). Mine was about an inch thick, so I know my waistband needs to be slightly longer to feed the elastic.
Using your seam ruler, fold the top edge of your fabric over 1/2 inch. Iron this first hem as you fold the fabric over.
Next, fold the hem over again, this time the width of your elastic plus 1/2 inch (in my case, 1 1/2 inches total) and iron along the entire edge of your waistband. It's important to make a double hem so the fabric doesn't fray in the wash. Baste the hem with pins before you head over to the sewing machine.
Pick out a thread that will blend in with your fabric (or one that will contrast if you prefer) and use that for both the top and bottom strands. I chose a gray I had on hand that would easily blend with the fabric.
5. Sew the waistband.
Before you sew the waistband, you'll want to make sure that you don't close it up completely or else you won't be able to put the elastic in! Leave about 2 inches open across the side seam of your skirt. Sew a 1/4 inch straight stitch along your band, backstitching at both ends (and remembering to leave the opening).
6. Add the elastic.
With your 2-inch opening in the waistband, attach a large safety pin to one end of your elastic.
Thread the elastic through one side of the opening and pull the safety pin all the way through to the other side. Your elastic is shorter than the total width of the waist, so you'll need to scrunch up the fabric as you go and make sure you don't pull the other end through.
After you've pulled the elastic through, overlap the edges and zig-zag stitch them together; backstitch across the entire width for extra stability.
Pull the elastic all the way into the waistband and stitch up your 2-inch opening. Your waistband is complete--it wasn't that hard, was it?
7. Complete the skirt.
Following the same steps to hem the waistline, use a 1/2 inch double hem to finish the bottom edge of the skirt (no need to leave an opening this time). And make sure you fold the hem towards the inside of the skirt--I've had to undo an entire skirt because I sewed the waist and hemlines on the outside of the skirt before.
Flip your skirt right-side out and, voila!, you have your simple skirt!
And I couldn't resist adding a sweet little ruffled rosette!
I'd love to hear about your own skirt-sewing and please let me know if you have any questions about the tutorial!
Labels: baby, clothing, sewing, tutorials
